
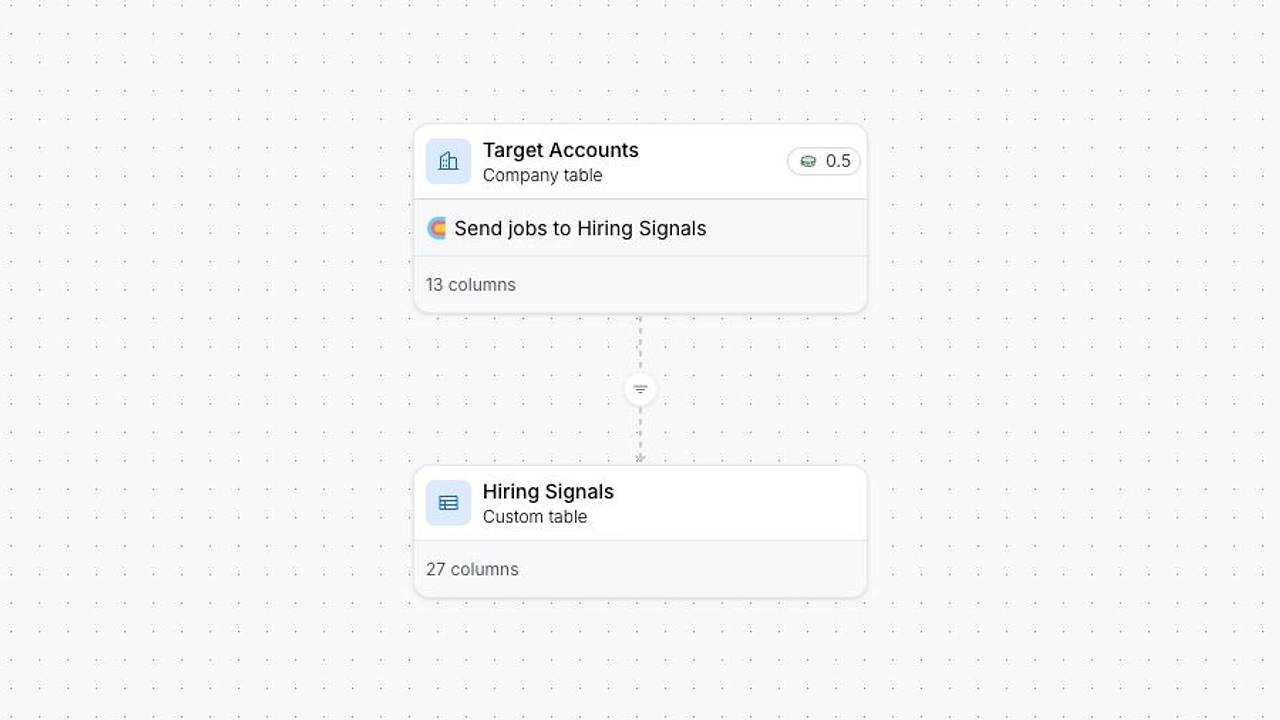
A working Clay Apify integration example.
The Curly LinkedIn Jobs Scraper is the concrete sample in this guide, not the only Apify Actor that can work with Clay. It is a fully working example with a real nested jobs list, which makes input mapping, list routing, field extraction, and deduplication visible from end to end. Once this version works in your workspace, you can reuse the integration pattern with another Actor by adapting its input properties and output fields.
The sample workflow uses two tables. Target Accountsstores one company per row and controls what should be collected. The Apify action runs in that table and returns a list of matching jobs into its source cell. A second action then sends every item in that list to Hiring Signals, where each job becomes a normal Clay row that can be filtered, scored, or passed to a GTM workflow.
That distinction matters: Clay's native Apify action returns the Actor data to the source cell; it does not automatically create one table row per job. The separate routing step is what turns nested Actor output into a useful operating table. Clay documents this as the Send table data action.
You can start from the public Curly Clay hiring signals template. This workbook is the tested sample implementation described below, rather than a universal template for every Actor. Its Actor and routing actions are manual by default, so copying it does not immediately run every row. Clay prevents the workbook from being embedded on an external domain, which is why the template opens in a separate tab instead of an iframe here.
What you need before you start.
- A Clay workspace with permission to add an Apify connection.
- An Apify account and an API token.
- For this sample, access to the Curly LinkedIn Jobs Scraper by Company Actor.
- A full LinkedIn company page URL for each target.
- A small test row with a real title and location filter.
Clay plan availability for bringing your own integration key can change, so confirm that your workspace exposes Apify under Connections before building the table. Store the token only in the Clay connection. Never place it in a cell, formula, Actor input, screenshot, or shared workbook.
If you have not used an Apify token before, read Apify's API integration guide. Clay's current connection flow is covered in its Apify integration overview.
Build the workflow step by step.
1. Validate the sample Actor input in Apify.
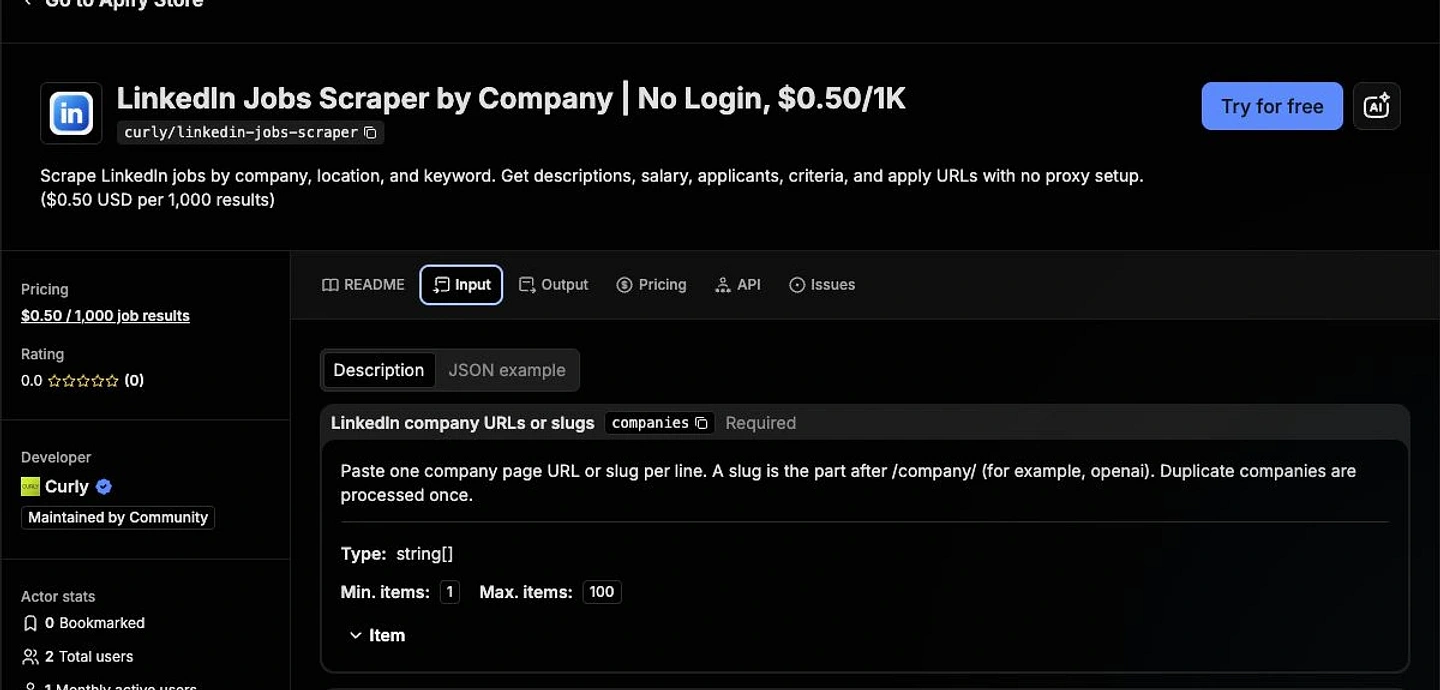
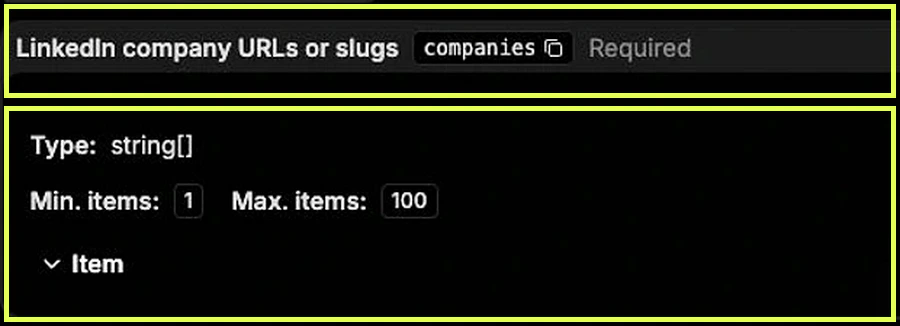
Open the Curly LinkedIn Jobs Scraper and select Input. This Actor is the working example used throughout the guide. Confirm that the required company field is available and run one narrow test before connecting Clay. This gives you a known-good input and makes it easier to separate an Actor problem from a Clay mapping problem.
{
  "companies": ["https://www.linkedin.com/company/perplexity-ai"],
  "locations": ["United States"],
  "jobTitles": ["Business Development"],
  "maxResultsPerUrl": 5,
  "postedLimit": "month",
  "sortBy": "date",
  "includeDetails": false
}
This is valid literal JSON, so it can be used for the first Apify test as written. includeDetails: false keeps a signal scan focused on core fields such as title, company, location, date, job URL, and job ID. Turn full details on only when a later workflow genuinely needs descriptions, salary, or application fields.
2. Pause automatic execution before setup.
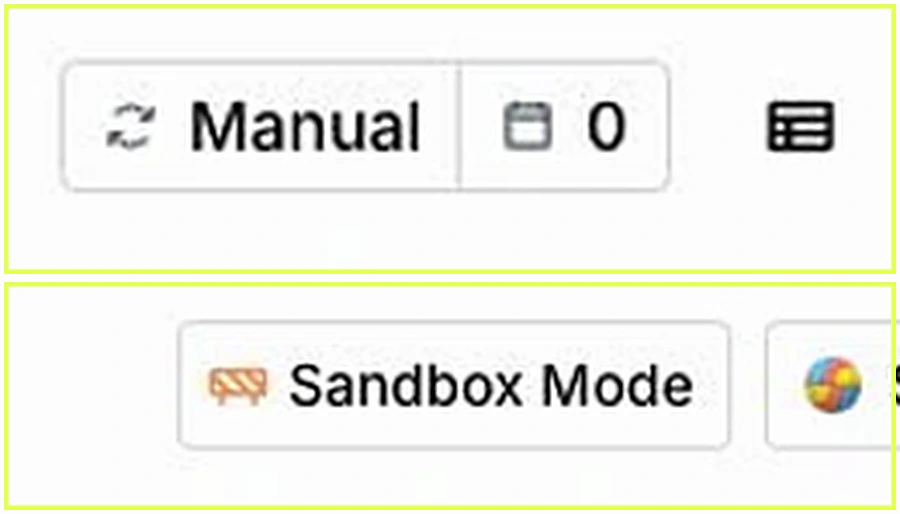
Clay tables can run new enrichments automatically. Before you add the Apify action, switch the table-level control to Manual. If your workspace offers Sandbox Mode, use it while editing and choose the option that publishes without running when you leave the sandbox. Keep Auto-run disabled on every new action column until its one-row test passes.
This is the safety boundary for the rest of the guide. Manual table mode prevents a newly configured action from consuming usage across every populated row while its JSON, limits, and credentials are still being checked.

3. Prepare the Target Accounts table.
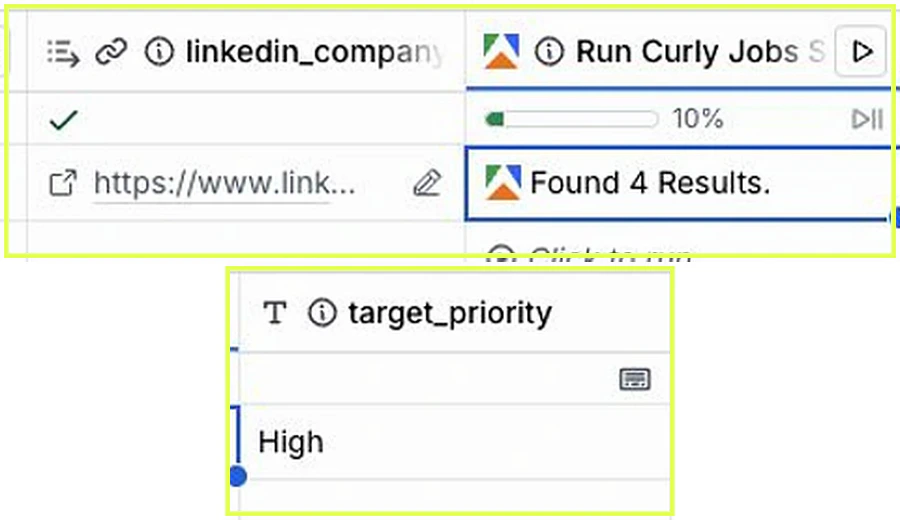
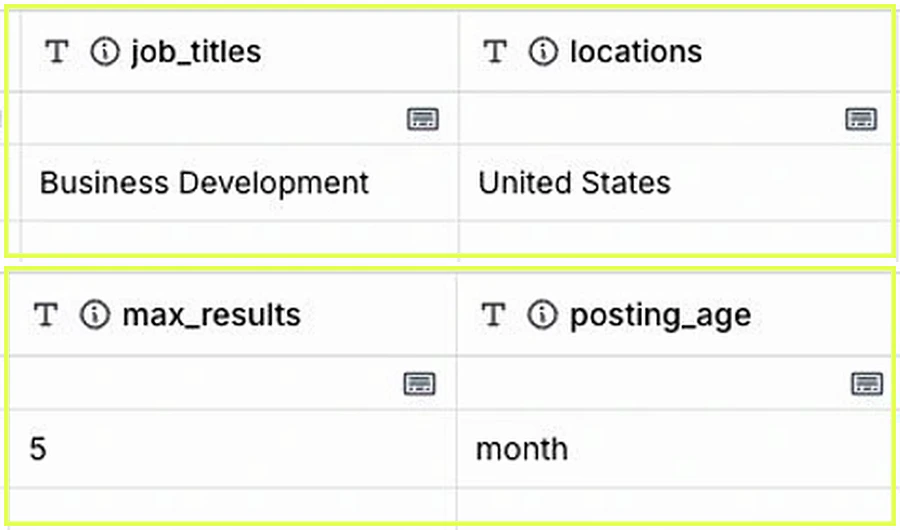
If you are building manually, create two tables in the same workbook: Target Accounts and an empty Hiring Signals table. The public template already contains both. Add one source row per company and use separate input columns instead of storing one large JSON string; operators can then change a filter without editing the action, and a failed row remains auditable.
| Column | Type | First test value | Why it exists |
|---|---|---|---|
| linkedin_company_url | URL | https://linkedin.com/company/perplexity-ai | Required full company page URL. |
| job_titles | Text | Business Development | Narrows the scan to one function or keyword. |
| locations | Text | United States | Limits jobs to a geographic market. |
| max_results | Number | 5 | Accepts 1–100; caps collection per company. |
| posting_age | Select | month | Choose 1h, 24h, week, month, or all. |
| target_priority | Select | High | Carries account context into every signal row. |
Populate both filter fields for the first test. The scalar mapping used below expects one non-empty title and location per row. Do not send a blank text value as [""]. Keep both fields required in this implementation; optional or multi-value formulas are a different input shape and should be validated as a separate workflow rather than introduced during the first working run.


4. Connect Apify to Clay.
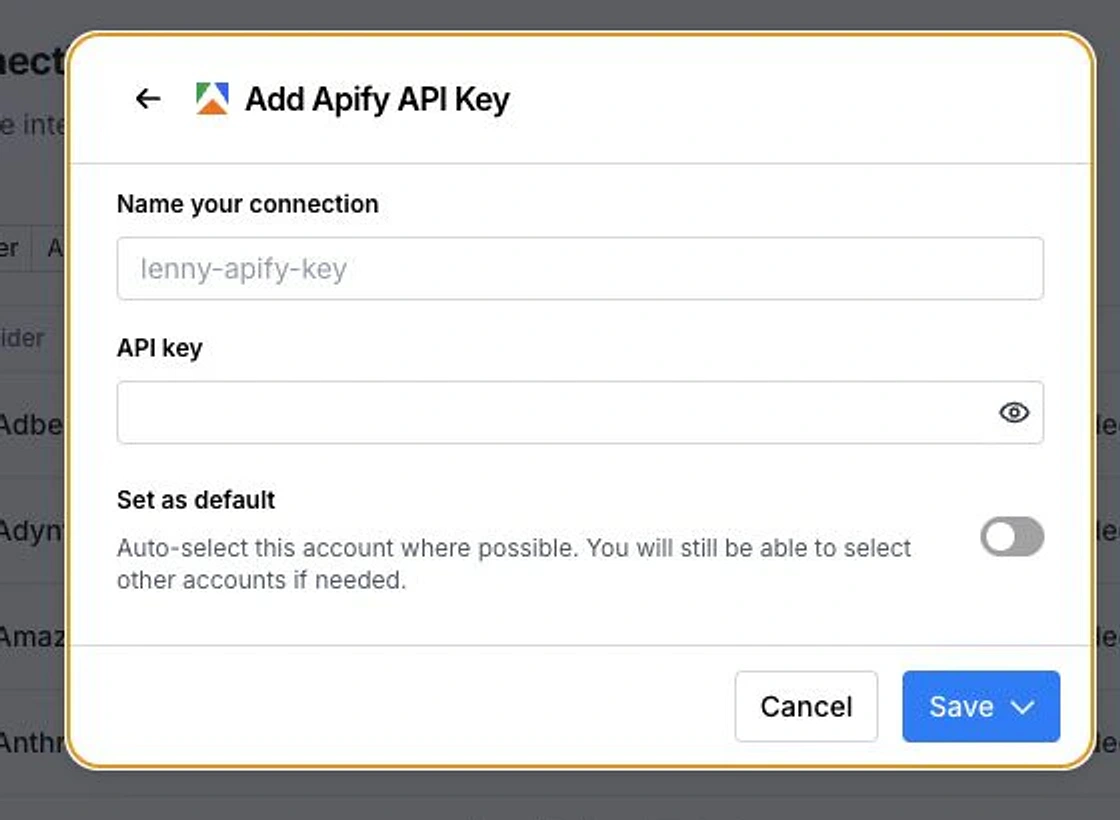
- In Clay, open Settings, then Connections.
- Choose Create, search for Apify, and select Apify API Key.
- Give the connection a recognizable internal name.
- Paste the API token into the API key field and save.
The screenshot deliberately shows an empty key field. A public template can retain the Actor configuration and column mapping, but every person who copies it must attach their own credential. Use a dedicated token that can be rotated without affecting unrelated production automations.
5. Add the Run Apify Actor action.
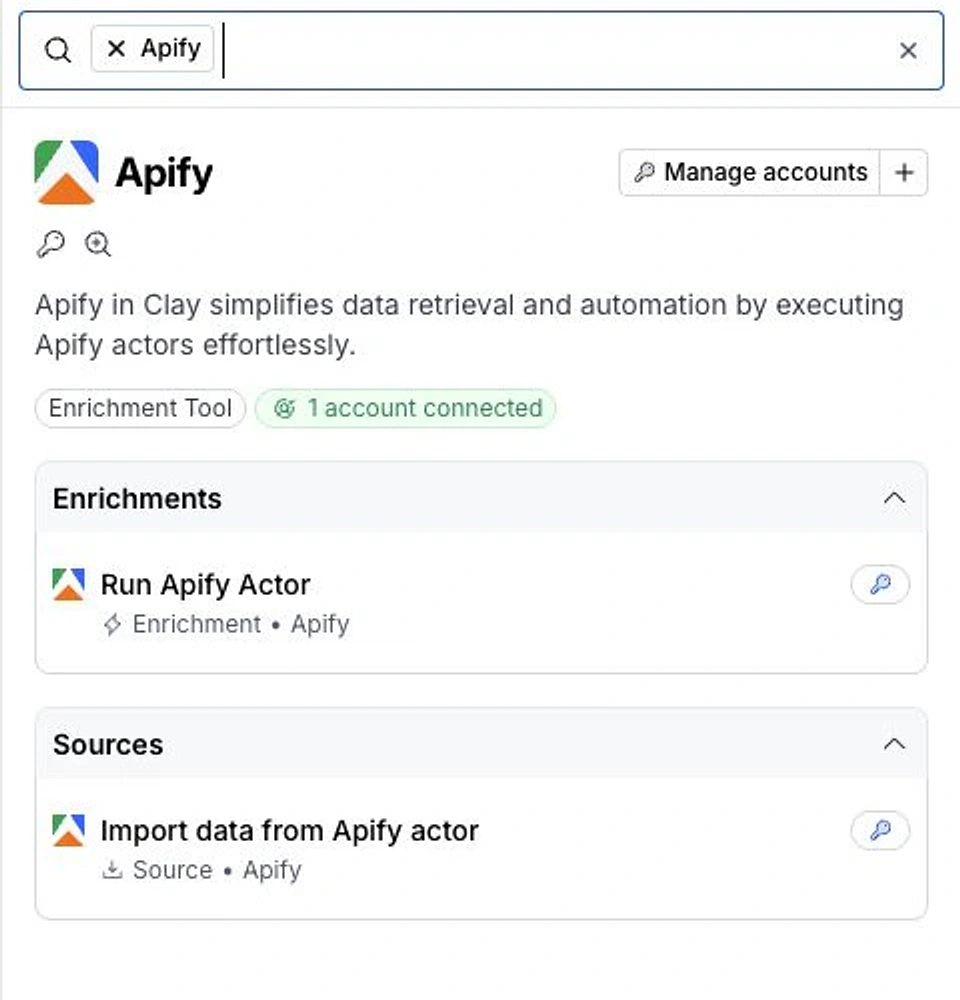
Return to Target Accounts, add a new enrichment column, and search for Apify. Choose Run Apify Actor under Enrichments. Do not choose Import data from Apify actor for this workflow: the enrichment action uses each current Clay row as the input for a new Actor run.
6. Map each row into the Actor input.
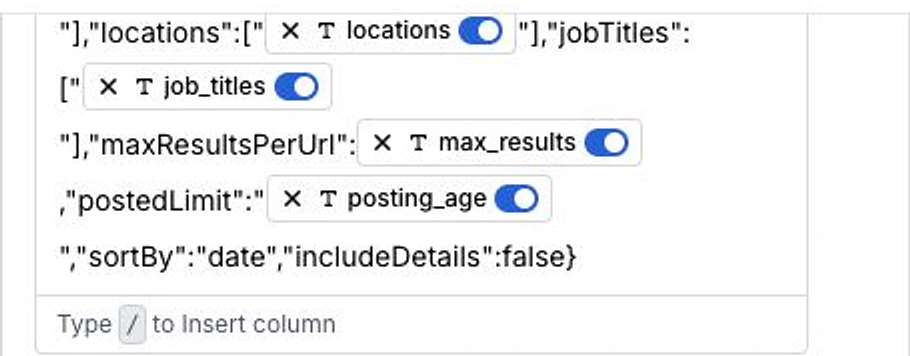
Select the saved Apify account, choose LinkedIn Jobs Scraper by Company, and expand Input data. Start by pasting the literal JSON from step one. Then replace only the sample values with Clay column pills by typing a slash and selecting the matching column. Preserve one pair of JSON quotes around text pills: company URL, title, location, and posting age. The numeric result-limit pill stays unquoted, while the boolean value remains literal. Do not type template braces around a Clay pill.
{
  "companies": ["<linkedin_company_url pill>"],
  "locations": ["<locations pill>"],
  "jobTitles": ["<job_titles pill>"],
  "maxResultsPerUrl": <max_results pill>,
  "postedLimit": "<posting_age pill>",
  "sortBy": "date",
  "includeDetails": false
}
The angle-bracket labels above represent Clay pills; they are not text to type. This exact layout is for scalar text columns. A Formula column that already returns a list requires a different JSON shape, so do not insert one into these brackets during the first implementation.
| Actor property | Clay column | Shape |
|---|---|---|
| companies | linkedin_company_url | Array of strings |
| jobTitles | job_titles | Array of strings |
| locations | locations | Array of strings |
| maxResultsPerUrl | max_results | Number |
| postedLimit | posting_age | String |
Preserve the property types. Companies, titles, and locations are arrays; the result limit is a number; posting age is one of the Actor's accepted string options. sortBy and includeDetails can remain fixed values unless the table truly needs row-level control over them.
7. Keep the first run small and manual.
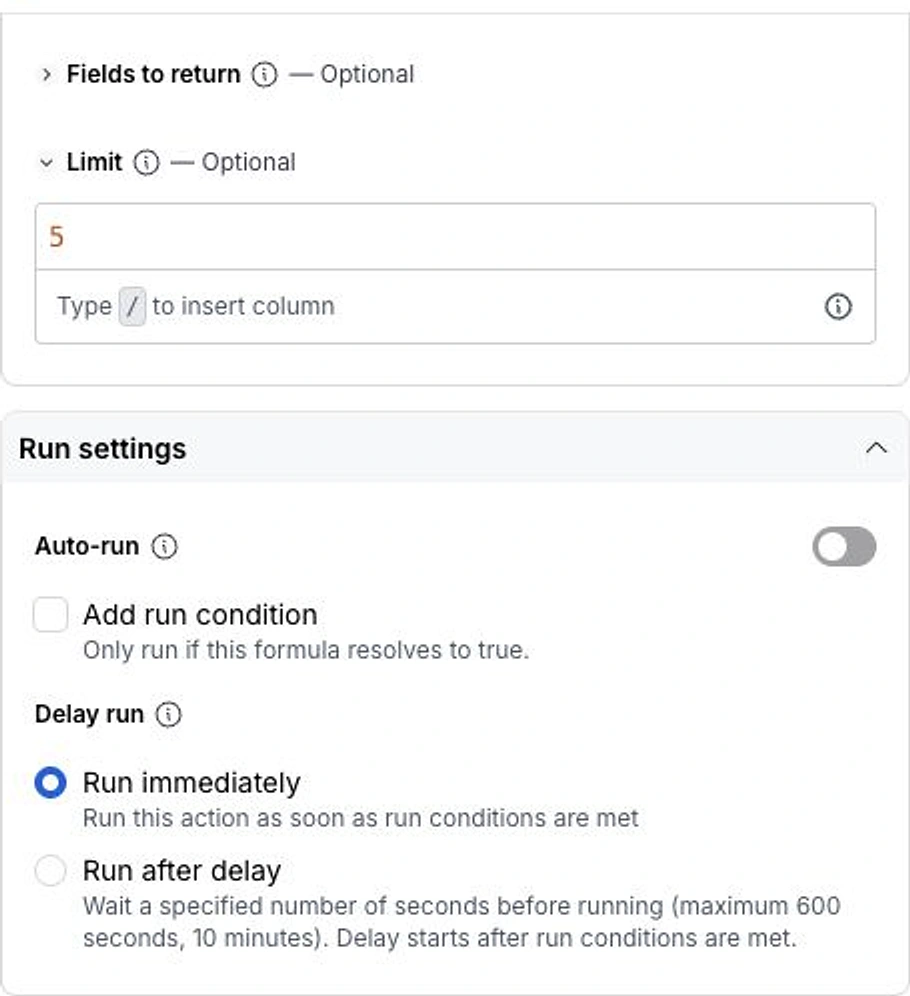
Set the Actor's maxResultsPerUrlto five and the Clay action's Limitto five for the first test. They control different boundaries: the Actor setting limits collection per company, while Clay's Limit controls how many returned dataset items the action imports.
Leave Fields to returnempty so the first run keeps every field needed by routing and deduplication. Keep the action column's Auto-run switch off, save, and click the action for one complete row only. “Run immediately” is only the delay timing option; it does not make an action manual. Manual table mode and the disabled Auto-run switch are what prevent a bulk run.
A run condition such as “company URL is not empty” is useful before Auto-run is enabled, but it does not replace the manual validation. Avoid fixed time promises: duration depends on Actor startup, filters, and the requested fields.
8. Inspect the source cell before routing.
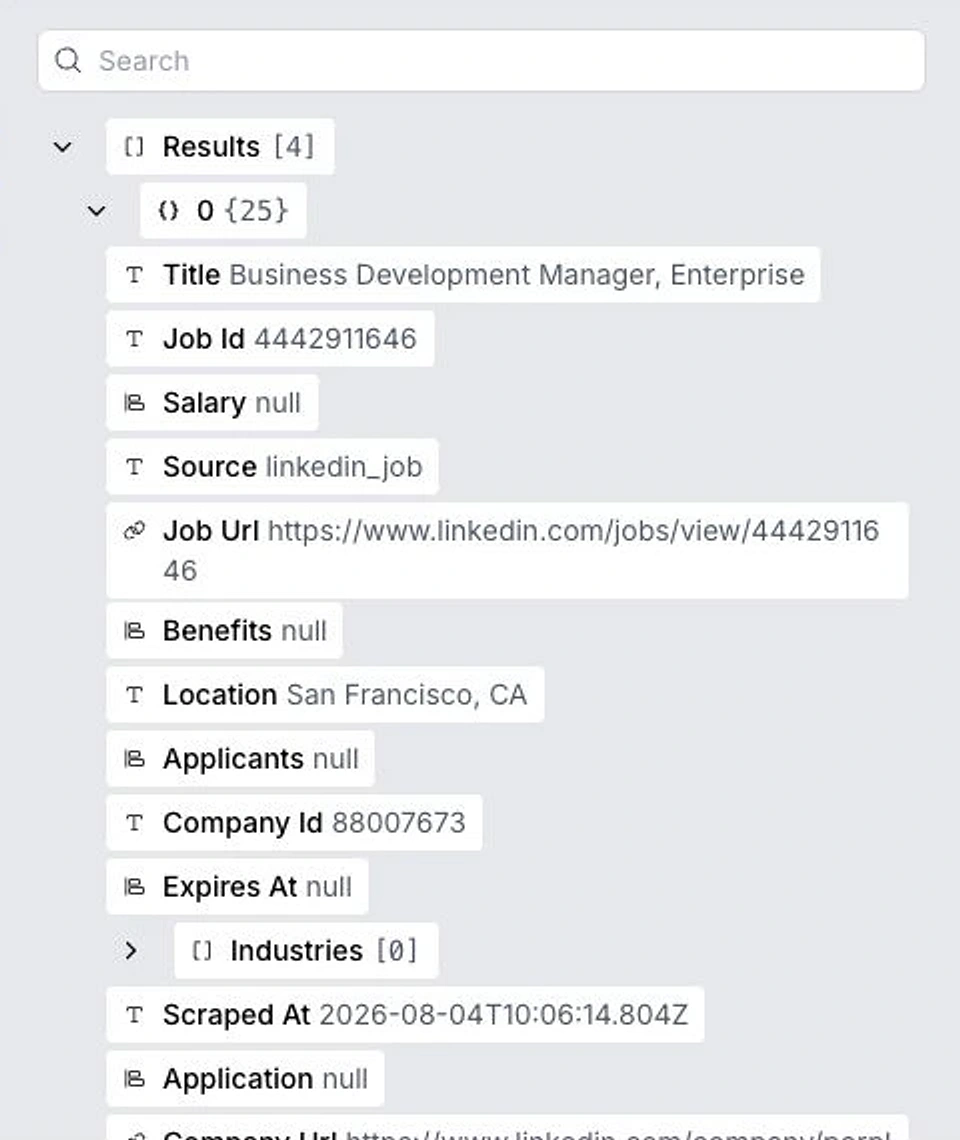
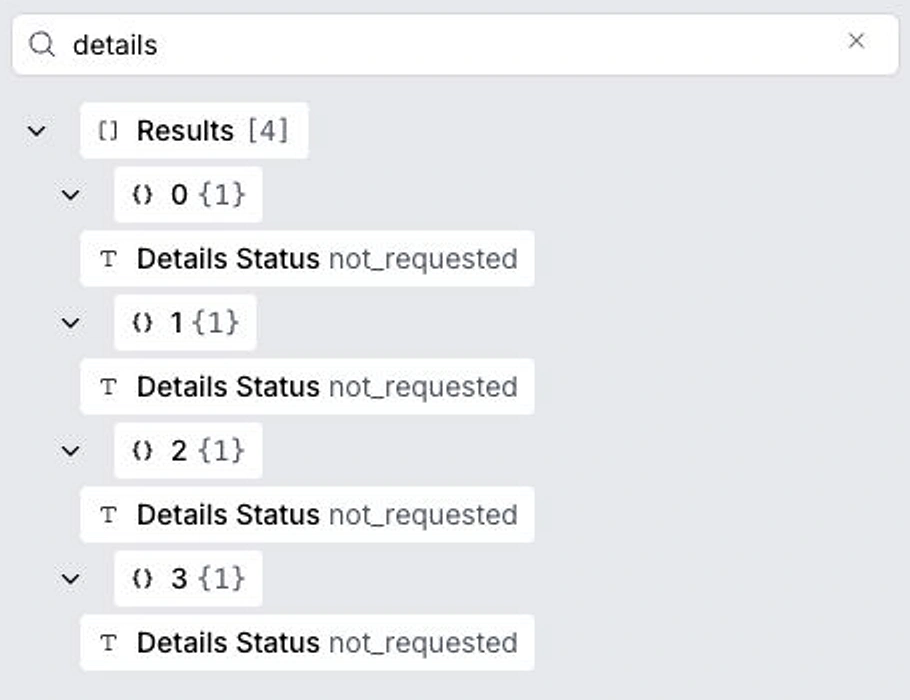
Open the completed action cell. A successful run contains a Results list with one object per job. Expand the first object and verify at least job_id, title, job_url, location, and details_status. Because this guide uses includeDetails: false, every result should report details_status as not_requested. The result count should be at or below the two limits configured in the previous step.
Stop here if Results is missing, the cell contains an error, or the list is unexpectedly empty. Routing an invalid source cell only makes the problem harder to locate. First reopen the row input, remove overly narrow filters, and compare the mapped JSON with the known-good Apify input from step one.
Use the cell detail search to verify fields that sit farther down the object instead of assuming they were returned. The filtered view below confirms that all four test jobs stayed in basic-results mode.
9. Route every job into Hiring Signals.
In Target Accounts, choose Add column, then Exports, Send table data, and select Hiring Signals as the destination. Set the method to Send row for each item in a listand insert the Actor action's Results list. This is the step that changes one company row containing a list into one destination row per job.
A flattened object first arrives in the destination's leftmost Rows from: Target Accounts source cell. Keep the raw Actor names for the first working version; Clay can extract those keys into normal columns after the route is configured. Renaming fields before the route is proven makes debugging unnecessarily difficult.
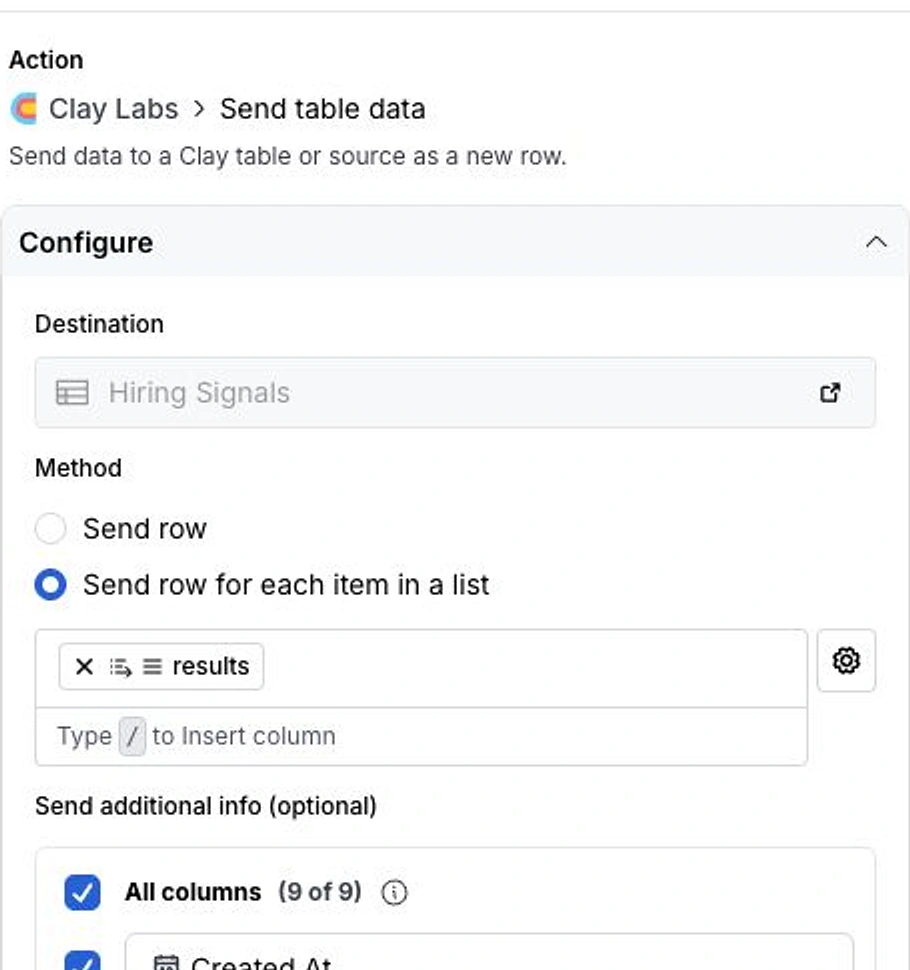
| Destination field | Value to send | Origin |
|---|---|---|
| job_id | Results[].job_id | Actor result |
| title | Results[].title | Actor result |
| job_url | Results[].job_url | Actor result |
| company_name | Results[].company_name | Actor result |
| company_slug | Results[].company_slug | Actor result |
| company_url | Results[].company_url | Actor result |
| location | Results[].location | Actor result |
| published_at | Results[].published_at | Actor result |
| search_keyword | Results[].search_keyword | Actor result |
| search_location | Results[].search_location | Actor result |
| details_status | Results[].details_status | Actor result |
| source | Results[].source | Actor result |
| scraped_at | Results[].scraped_at | Actor result |
| target_priority | target_priority | Target Accounts row |
| first_seen_at | Created At | Hiring Signals row, automatic |
| signal_status | New | Hiring Signals formula |
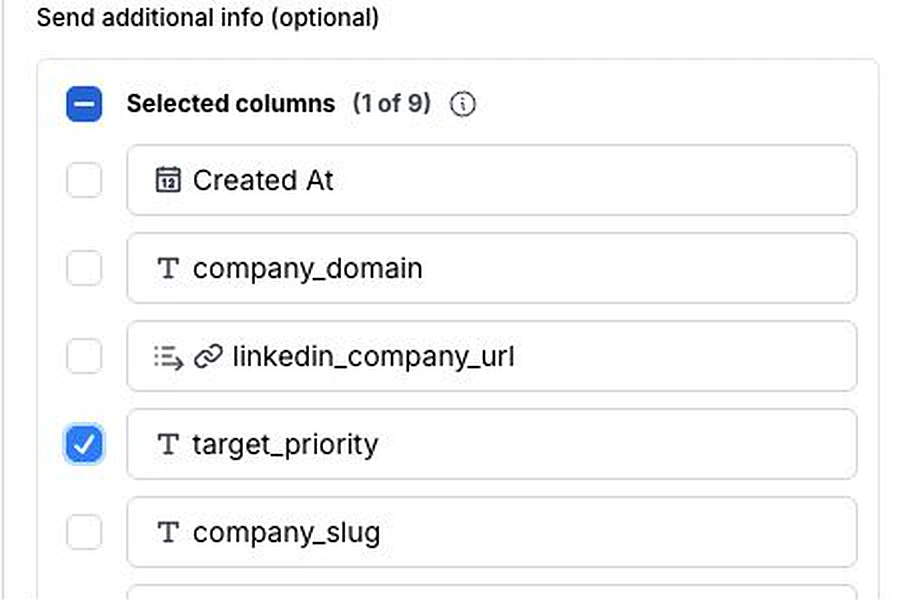
Under Send additional info, turn off All columns and keep only target_priority. Do not map the Target Accounts Created At field to first_seen_at: it records when the company was added, not when the job was detected. Use the destination Hiring Signals row's own Created At value as the first-seen time; keeping the oldest duplicate preserves that earliest detection.
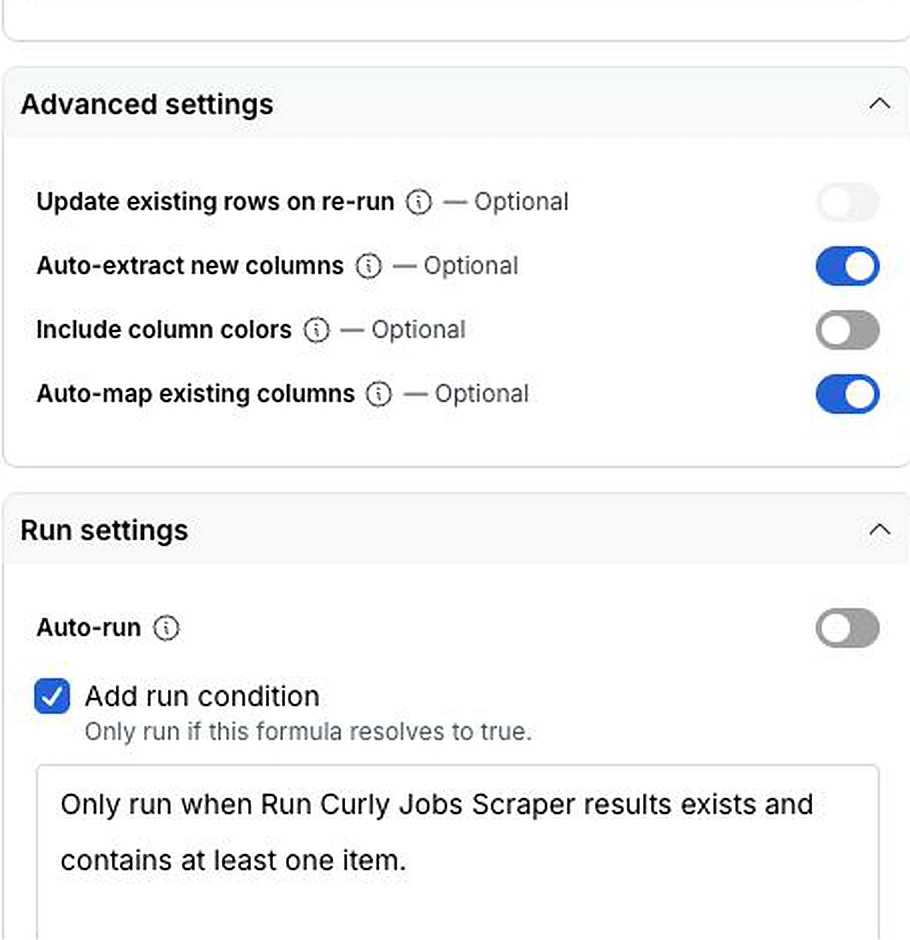
Expand Advanced settings and enable Auto-extract new columns. This creates normal destination columns such as job_id and title from the nested source cell. If columns already exist, Auto-map existing columns can align compatible fields; otherwise you can open a destination source cell, hover a field, choose Add to column, and select the intended column manually.
Keep routing Auto-run off for the test. Add the run condition “Only run when Run Curly Jobs Scraper results exists and contains at least one item,” preview the generated condition, and save. Then manually run the routing cell for the sample row. If Results contains four items, Hiring Signals must gain four rows. Open one destination source cell and confirm the expected fields were extracted before continuing.
In Hiring Signals, add a Formula column named signal_status and use the string formula "New" as its default state. This matches the public template and keeps destination workflow logic out of the Target Accounts source table.
10. Deduplicate repeated scans on job_id.
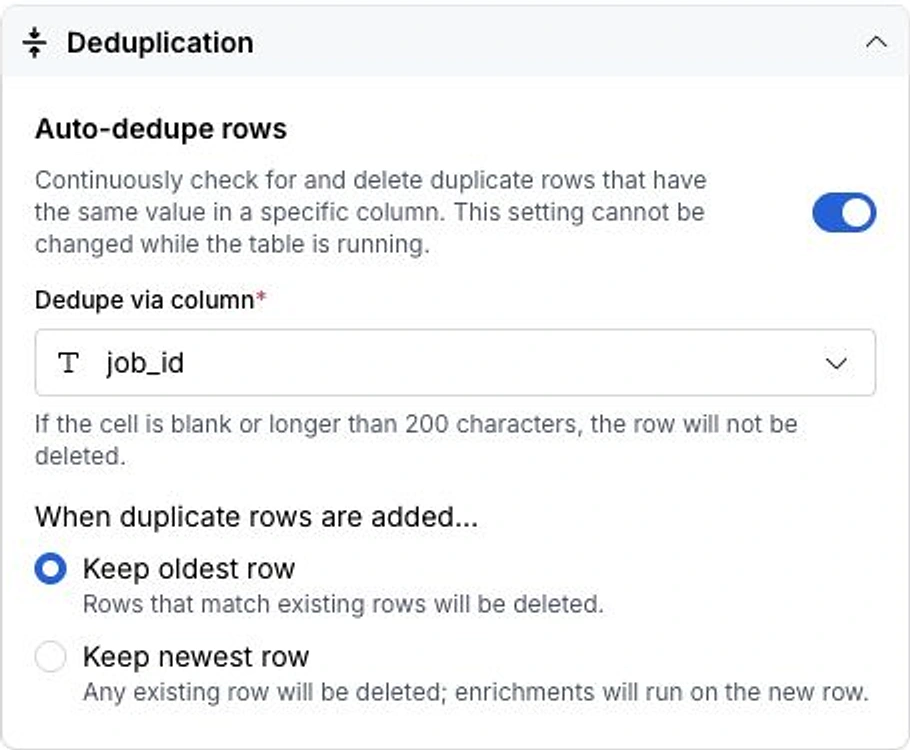
In Hiring Signals, open Table settings, expand Deduplication, enable Auto-dedupe rows, and select job_id. Keep the oldest row. That preserves the first-seen record and removes a later copy if the same LinkedIn listing appears in another scan.
Before enabling automatic runs, deliberately run the same source row and routing action a second time. Confirm that the first route added exactly Results.length rows and that the second route retains zero new rows for unchanged job IDs. If the count grows, check that job ID was extracted as a plain value and is not blank or transformed differently between runs.
What a successful Hiring Signals table looks like.
The final table should contain several normal rows for one source company, not a single cell with an opaque list. The example below shows four Perplexity jobs routed from one Target Accounts row. Each row inherited the account priority and received a signal status. The public template shown here also evaluates the optional category and score formulas for downstream qualification.
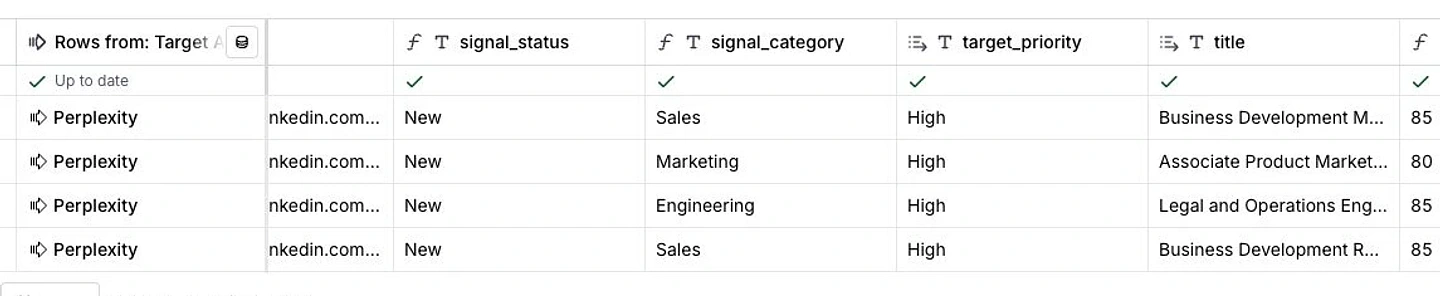
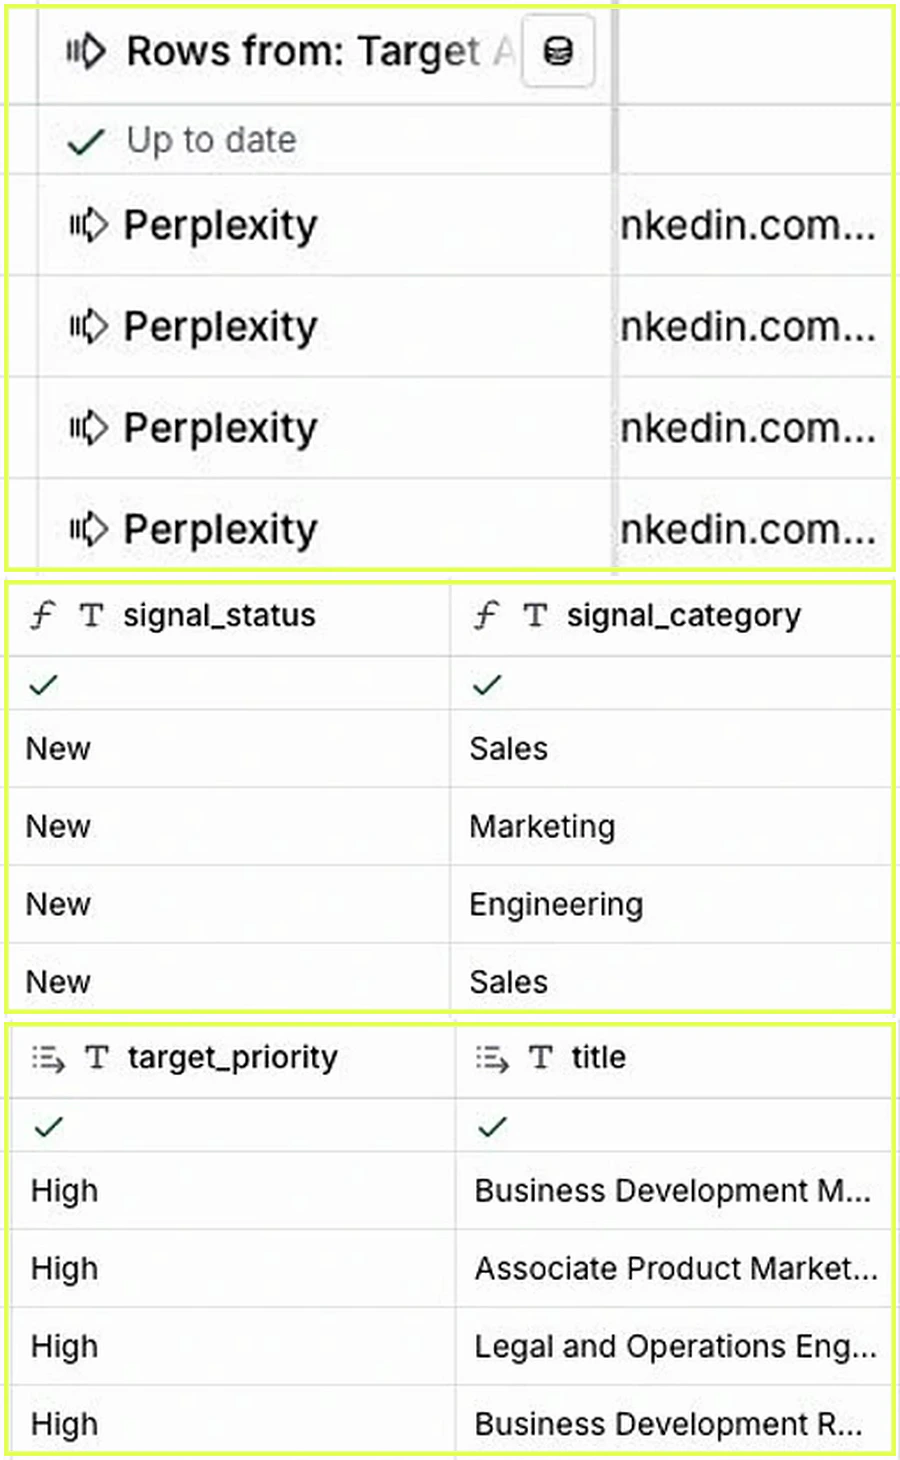
A useful signal table keeps raw evidence and interpretation separate. Fields such as title, location, publication date, and job URL remain source data. The manual workflow in this guide ends with those raw fields plus target_priority and signal_status; the destination row's Created At value is the first-seen timestamp. The public template also contains optional formula columns for signal_category and signal_score; they are examples for downstream qualification, not fields required to route the jobs successfully.
| Workflow field | Recommended use |
|---|---|
| signal_category | Group roles into Sales, Marketing, Engineering, or another team taxonomy. |
| target_priority | Carry the account tier from Target Accounts into each job signal. |
| signal_score | Combine recency, function match, and account priority into a sortable score. |
| signal_status | Move rows through New, Reviewed, Qualified, or Ignored. |
| first_seen_at | Use or alias the destination row's Created At value; do not copy the source company timestamp. |
Schedule recurring scans without wasting runs.
Enable recurrence only after the one-row run, routing test, and duplicate test all pass. Clay separates automatic action execution from scheduled column reruns; switching on Auto-run alone does not guarantee that unchanged target rows will be rescanned on a future date. Use Clay's scheduled columns for recurring checks with unchanged inputs.
- Click the table-settings gear in the bottom-right corner. Under Run Settings, choose Re-run columns on a schedule, start with Week, select Only selected columns, and choose only Run Curly Jobs Scraper. Keep that Actor column's own Auto-run switch off; the schedule controls its repeat execution.
- Turn the Target Accounts table-level master Auto-run on and choose Continue without runningso existing action cells do not fire immediately. Clay's table-level switch must be on before any column can run automatically. The current behavior is documented in Clay's table management settings.
- Enable Auto-run only for Send jobs to Hiring Signals. Retain the tested condition “Run Curly Jobs Scraper results exists and contains at least one item.” Its generated formula references the Actor Results list, while the Actor itself remains schedule-controlled.
- Observe one scheduled cycle in History instead of assuming the dependency worked. The Actor must finish first, routing must run second, and unchanged job IDs must add zero retained destination rows. If that sequence does not appear, return the table to Manual and keep the workflow unscheduled.
The final production state is therefore explicit: table-level Auto-run on, Actor-column Auto-run off, routing-column Auto-run on, and only the Actor column selected in the schedule. Increase the frequency only when the team can act on fresher signals and the added Actor runs are justified.
Troubleshoot the workflow by failure point.
The Apify connection fails.
Reopen the Clay connection, confirm that the token has not expired or been revoked, and test it outside the shared workbook. Replace a compromised token immediately; do not paste it into a table cell to work around connection problems.
The Actor reports invalid input.
Compare the mapped input with the literal JSON in step one. Check array versus scalar types, confirm that the numeric limit is not a quoted string, and remove blank strings from title and location arrays. Reinsert Clay column pills instead of copying placeholder syntax from another tool.
The Curly Actor is missing from the selector.
Confirm that Clay is connected to the Apify account that can access the Curly Actor. Open or add the Actor in that Apify account, then reopen the Actor selector in Clay. If it still does not appear, reconnect the intended Apify account instead of selecting a similarly named Actor from another workspace. Refresh fields is for the schema of an Actor that is already selected; it does not grant access to a missing Actor.
The Actor runs but returns no jobs.
Confirm that the input is a LinkedIn company page, not a personal profile or job URL. Then widen the posting age and remove the title or location filters one at a time. If the same literal input also returns no jobs in Apify, the problem is the query or current public job availability rather than the Clay connection.
The source cell has results but Hiring Signals is empty.
Inspect the Send table data action. The method must be Send row for each item in a list, and the list input must point to the Actor cell's Results array. A single-row method writes the list as one value instead of expanding its items.
Repeated scans still create duplicates.
Confirm that job_id reaches the destination table and that auto-deduplication uses that exact column. Clay does not dedupe blank values, and job titles are not stable unique keys. Keep oldest is preferable when the first-seen timestamp matters.
A run is slower than expected.
Reduce the two result limits, keep full details disabled, and test one company. Actor startup, LinkedIn response time, filter breadth, and detail-page requests all affect duration, so use successful output—not a fixed number of seconds—as the acceptance condition.
Use the free tool for a one-off export.
This Clay Apify integration is intended for company lists, recurring scans, and downstream signal workflows. If you only need to inspect one company and download a small JSON or CSV file, use the free LinkedIn jobs scraper instead. Use the Apify Actor and Clay workflow when you need more companies, automation, or a durable destination table. For a direct programmatic setup, generate the request and inspect the schema on the LinkedIn Jobs API page.